Wednesday, February 29, 2012

Screen Printing on Silk

Remember that nice clean studio???? Well check out all the photos I just posted of my screen printing on silk project. Not so tidy anymore LOL.
Printing with a glue resisted screen on silk. I am using Dupont dyes thickened with alginate and Urea water

Building layers

Screens coated with thickened dye for breakdown printing

Allowing the thickened dye to dry on the screen for breakdown printing

Allowing the thickened dye to dry on the screen for breakdown printing
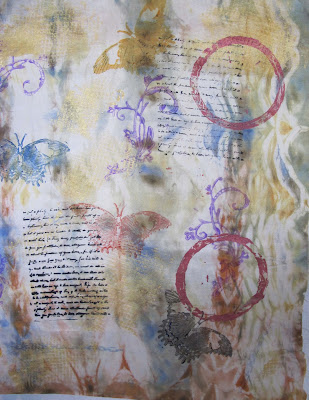
I didn't get my Day 8 Collage posted the other day so I am posting it today with my day 9 collage

Day 9, Collage 9

Monday, February 27, 2012

Stretching Screens for Screen Printing, Crochet Plastic Bags, Collage 7

We had our last class on crocheting with plastic bags the other night and were learned how to finish up our bags with handles. Here is a photo of my finished plastic bag tote. Here is a link to the post that has photos of the various steps: Crocheting With Plastic Bags

I spent yesterday afternoon mixing up print paste with alginate and urea and  stretching curtain sheering over wooden frames to make screens for screen printing on silk. Today I need to tape them up with Gorilla tape. The Gorilla tape works better than the Duct tape, I am told, because it is instantly waterproof where as with Duct tape you need to wait 24 hours before using the screens after taping. Being the impatient artist that I am that is one huge plus!

Such a lucky gal to have a hubby that makes the wooden frames and varnishes them for me!
 Stretching the curtain sheering over the wooden frames. It has been so long since I have made new frames that I forgot to angle the staples on the first one so I hope it holds!

The tools of the trade. I love my little hammer for banging the staples in nice and flat.


 Day 7,  Collage 7

Sunday, February 26, 2012

Day 6, Collage 6

 
On the run today so just posting my daily collage for now. 
Have a creatively inspired Sunday everyone!

Saturday, February 25, 2012

Block Printing on Silk With Resistad & Day 5 Collage


I added another layer of block printed images to my silk art cloth yesterday. I used Resistad colored with Dupont French dyes to do the block printing then steamed for an hour and a half in the horizontal silk steamer.

For those of you that would like to learn more about Resistad here is an article I wrote back in 2006v about it: Resistad Article and here is the link to the Procolour website where you can contact John Mitchel the inventor of Resistad Procolour Website There is also a ver informative article on Resistad on the Silk Pinting Network


Day 5, Collage 5...dropped it after gluing and the whole thing shifted position. The Universe must have decided it needed to be other than it was.
 

Friday, February 24, 2012

Spontanious Art Cloth, Shibori...sort of

After I did my daily collage yesterday as a warm up/creative meditation I took some silk scraps I had stuffed in a drawer and started building some layers in the manner of complex cloth. I wanted it to be very spontaneous, which is the total opposite of how I work when creating my silk paintings. No reading directions, following patterns or premixing dyes, I just wanted to "have at it" and see what happened. I started with some pole wrapping with elastic bands and built a few very subtle background layers on top of that. The last layer of the day was accomplished by just scrunching pleated fabric into an organic blob with rubber bands.
Each piece of cloth has approximately 2 to 4 very light background layers on it which I plan to continue building upon and then discharging. The best part is letting go of any attachment to outcome and just playing with it. None of the stress that comes with the paintings I produce to sell in galleries. Very freeing and stress relieving.
Pole wrapped silk with layer 2 added

Unwrapping silk

2 background layers so far
Peaches and browns...is that a face with a beak :-)

Adding layer 3

3 background layers so far
I like the wavy border

Unwrapping the second piece of spontaneous art cloth

First layer. I love the border

Bundled up and ready to add layer 2

Gaining some depth

I think there were 3 layers at this point

Don and I thought this creature looked like a praying mantis


The experimental pieces hanging on the line awaiting more layers. The Peach, blue brown one has four layers in this photo.

Thursday, February 23, 2012

Day 4 Collage 4

I have been working on some complex cloth/art cloth experiments in the studio today and will upload some photos tomorrow. We have our last class on crocheting with plastic bags tonight so I have to get some dinner ready early so we can be out of here on time. I did want to take a minute to upload my collage for the day so here it is:

Day 4, Collage 4

Wednesday, February 22, 2012

Awesome Studio Reorganization & My Day 3 Collage

My studio had gotten really disorganized and cluttered. It was really cramping my brain every time I went in there to work and I felt like I had no room for anything or enough space to put things away. Thankfully my hubby is a master at organizing things I asked him to help me sort it all out and make it function better. Here are the before and after shots.

You Can Click on Photos to Enlarge
BEFORE: My drawing area

BEFORE: Shelves and storage bins blocked by items on the floor

BEFORE: Shelves are over loaded & disorganized

BEFORE: Clutter everywhere

BEFORE: Counters covered with stuff

BEFORE: Ok overwhelmed! Time to call in my master organizer Hubby.....Don Heeeeelp!!!!!

AFTER: Cleared up all the junk off the floor

AFTER: Drawing area decluttered & sewing machine is off the floor

AFTER: Hubby working on matting a painting for me

AFTER: No junk on the floor in front of the storage drawers

AFTER: Shelves are all organized and lightened up

AFTER: Silk racks all hung on the wall with care

AFTER: Don't ya just want to come on in and create something :-)

AFTER: Counter cleared off, dyes and resists organized

AFTER: Free access to my storage bins with all the stuff off the floor

AFTER: And best of all he finally made me DOORS for my cabintes!!!!! Whooo Hoo!!! 

AFTER: Loving those cabinet doors

AFTER: Look how tidy the counters are!

Sun is pouring in, hot tub is humming away on the deck...time to head out for a soak but first I will post my day 3 collage below
Well today was day 3 so here is collage 3. See ya tomorrow!