My silk scarves and silk painting prints are currently included in 6 Etsy Treasury Showcases. Check them out via the links below and please leave comments for the wonderful folks that create these Treasuries!
http://www.etsy.com/treasury/4c7a8f7110246d913e67bf64/the-legend-of-sleepy-hollow?index=0
http://www.etsy.com/treasury/4c658bff8bf46d9136571c1e/dont-let-summer-end
http://www.etsy.com/treasury/4c2a4a633d6d8eef76e29f44/waterwater-everywhere-not-a-drop-to
http://www.etsy.com/treasury/4c45b3483f476d91aa615b28/laundry-day
http://www.etsy.com/treasury/4c5509cbf5456d915b82a83d/green-velvet
http://www.etsy.com/treasury/4c42857e57e06d9171958371/summer-in-new-england

Sunday, August 29, 2010
Thursday, August 26, 2010
My Sketchbook Arrived for the Sketchbook Project !!!!!!

I can't wait to dig in and get started. I plan on doing some of the pages in silk but I am not sure if I will just mount the silk art to the moleskin pages or if I will rebind the book I want to apply silk to the cover but we are not allowed to remove our I.D. card adhered to the back of the book so I will have to make allowances for that.
Now I wish I was not going to be tied up all weekend because I would love to hunker down and get started!!! Lots of pages to be filled by January 15, 2011. That is the day the books must be returned by.
For more on the Sketchbook Project follow this link:
http://www.arthousecoop.com/projects/sketchbookproject

Wednesday, August 25, 2010
Silk Painting Completed & Ready to be Steamed


Tuesday, August 24, 2010
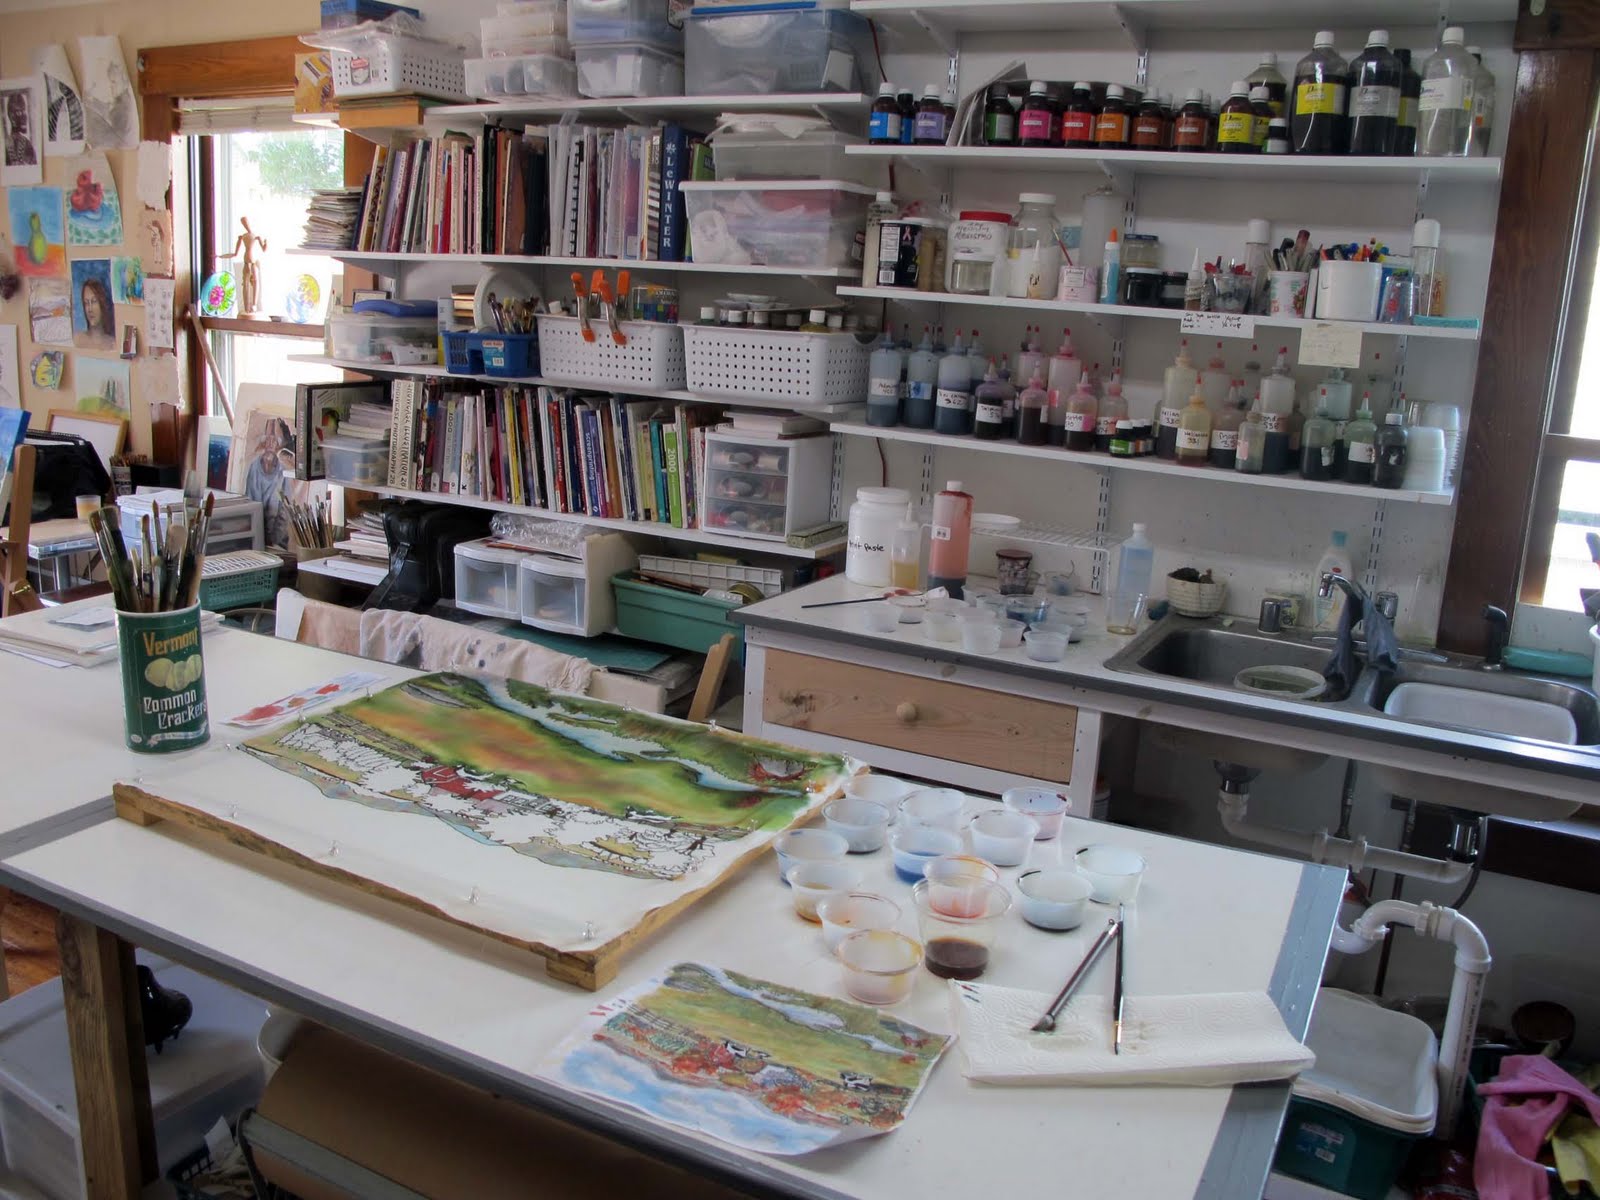
Started Layering Dye on "Heading South"

I plan to work on it again today and am hoping Don will get the mats and mounting boards cut for me for both paintings in the next few days. He has been working on building the frames for them but with all this rain it has bee to humid to spray paint them. The frames get a weird fogging if spray painted on a rainy day.
Monday, August 23, 2010
Matting, Shrink-wrapping & Framing. I Gotta Guy!

I am so lucky to have a husband that helps me out by cutting all of my mats and doing all of my framing! He even builds all of the wooden frames that we use on my silk paintings. I mount and mat the silk but he cuts the mats and then does all the framing work.
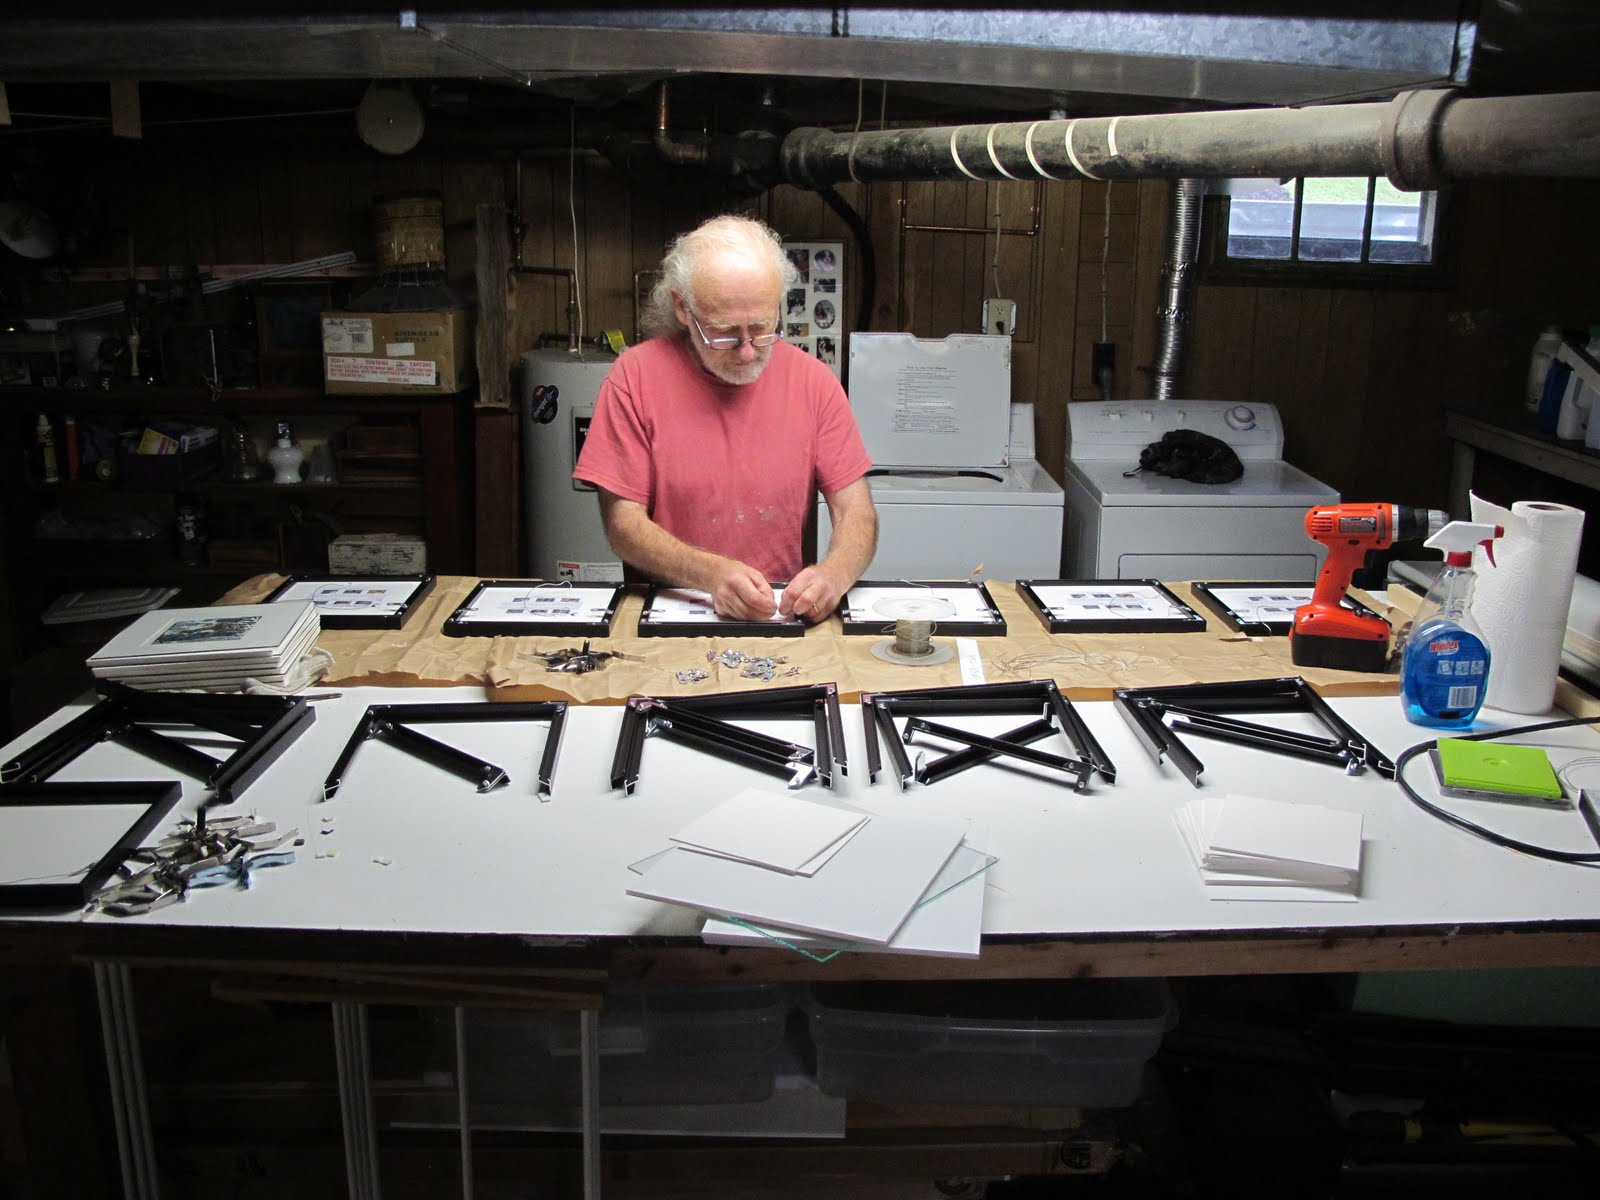


And here is one of the print orders, for both shrink-wrapped and framed prints, all ready to be packed up and shipped out.

Sunday, August 22, 2010
Got a Spiroliner Drafting Board & Drafting Accessories at a Tag Sale!!!

Went to a tag sale and found this Spiroliner drawing board with attached parallel straight-edge, carrying case/portfolio, compass, drafting pencils, leads, pointer, scaling ruler, guides, book and more!!! What a great find, even hubby had to play with my new toy once I got it set up in the studio. The drawing board adjusts from flat to a few different angles.


Saturday, August 21, 2010
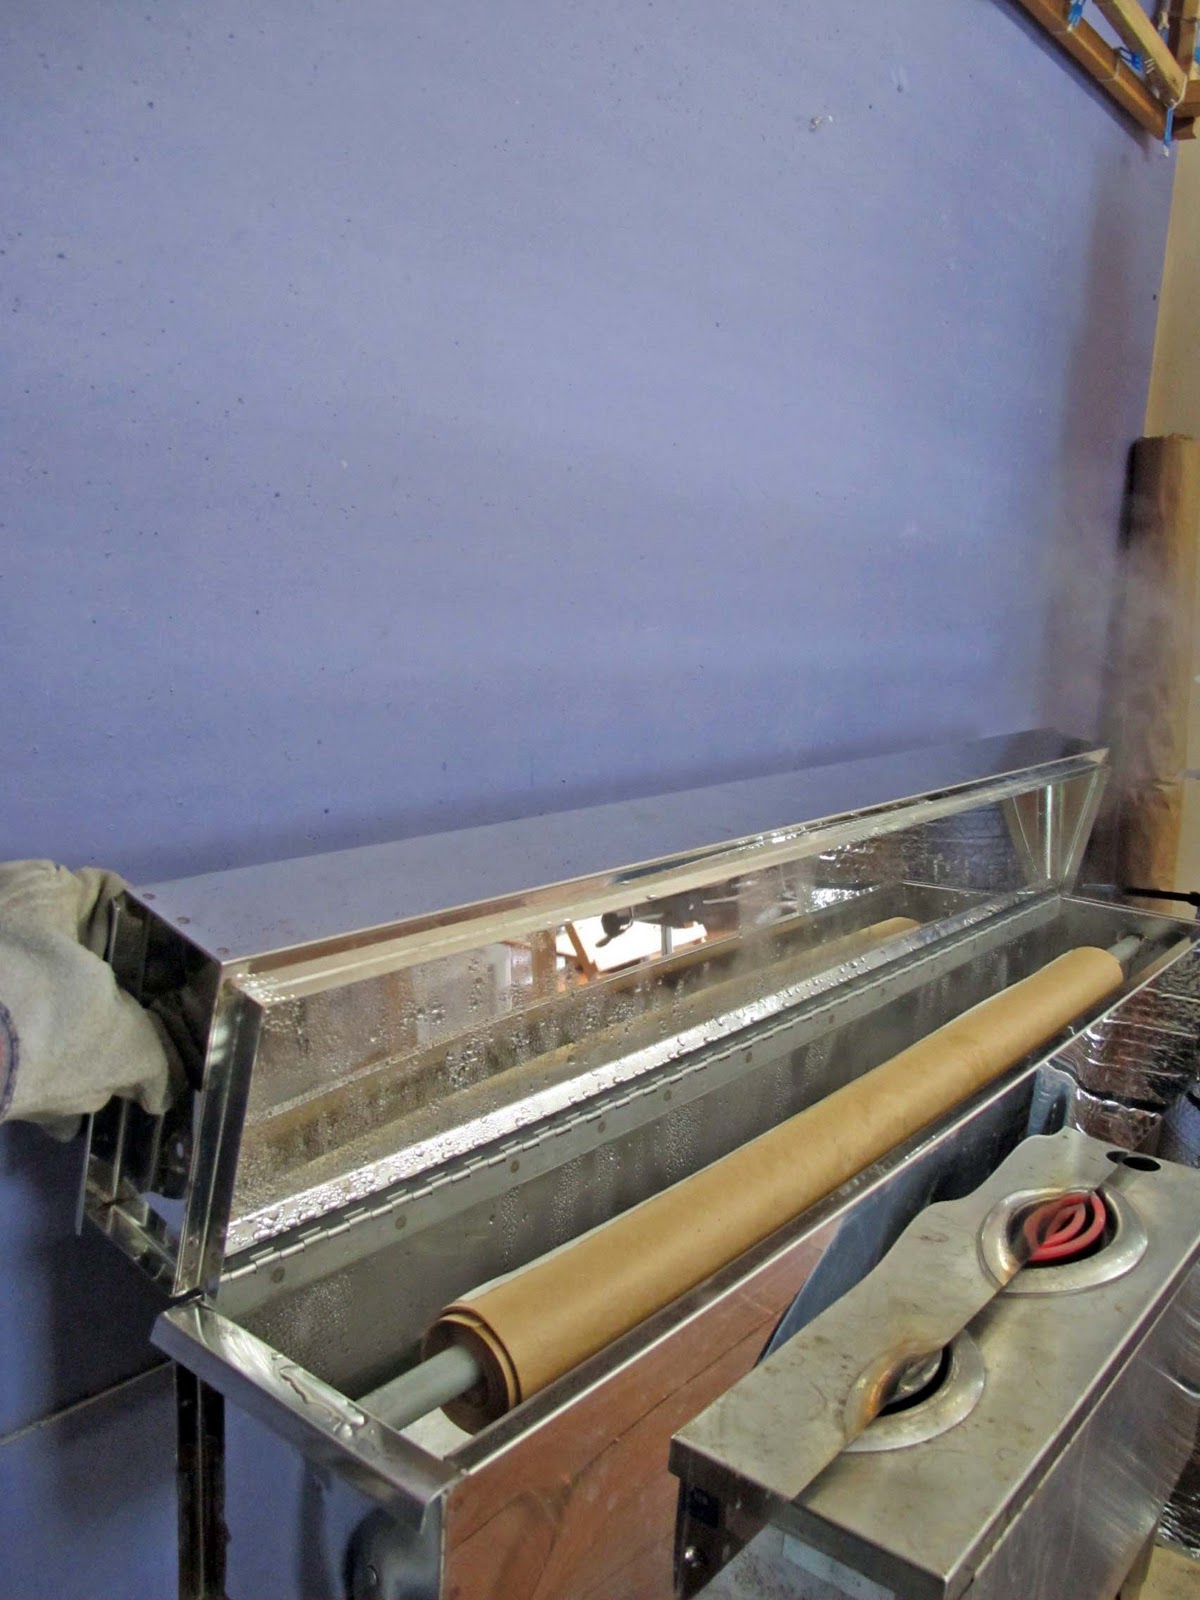
Final 3 hour Steaming and Voila!


Below the silk has been removed from the steamer, unrolled and is bring washed to remove the black resist residue and the excess dye molecules on the surface of the silk.


Friday, August 20, 2010
It's Done.......I think??????


As I have explained before the paintings tend to look a little dull and even muddy before they go through the 3 hour steaming process in the silk steamer. Once they are steamed the dye molecules join with the silk molecules and the surface dye is rinsed away. After washing the iridescent sheen of the silk comes back and the colors take on a brilliant reflective quality.

Thursday, August 19, 2010
My Habitual Mid-Painting Freak Out
Yup I am an artistic basket case at the mid-painting point, and sometimes it lasts up until the painting has left the studio and is in some distant gallery. I even called a gallery manager once and told him I had made a mistake sending him the painting and asked him to remove it from the gallery wall. He politely talked me down from my fevered painting-hating-hysteria and the painting sold within 2 weeks. It is also one of my top selling prints. So there VOICE, take that!
Whenever Don walks into the studio at the mid-painting point, like he did today, he says "Hows it going?" and I respond with something like "It is coming out awful, nothing works, it is a disaster, I'm freaking out, what am I going to do??!!!" He then says, "Oh good, so things are progressing as usual." Then I counter with words that I don't even think my spell checker will let me type here but you get the idea.
So anyway here I am mid-painting, freaking out as usual. I decided to walk away for a while, take a break and take some photos of it to get some distance and perspective. Because my paintings are created with dyes on silk any corrections are pretty much impossible but often some distance calms me down enough that I can at least resume working on the darn thing again.
Oh how I long to finish these two paintings and get back to playing with screen printing, block printing and discharging art cloth.....now that is FUN!!!!!!!
OK, back to work, deep breaths.......breathing in I love my painting.....breathing out I love my painting......Ohmmmmmm..........


Wednesday, August 18, 2010
To Steam or not to Steam , Silk Dyes or Silk Paints

A couple of important differences between paints and dyes are that silk paints, no matter how thin, cover the silks luminous surface and make it dull. It is the same idea as putting watercolor paint over paper or oil paint on a canvas which will then cover the surface of the canvas. Silk paints also leave a "hand" or stiff feel to the silk and that affects the silks liquid drape. Steam set dyes allow the iridescent brilliance of the silk to shine through and leave absolutely no hand or stiffness to the silk. Because of the steaming process the molecules of the dye actually join with the molecules of the silk so the color becomes part of the silk fibers and does not sit on top of the silk as paints do, therefore the dyes will not cover up the beautiful shinny surface of the silk


The next step will be to re-stretch the silk onto the wooden stretchers and to begin applying the layers of dye.
Tuesday, August 17, 2010
The Resist Flowed onto the Silk Like Honey Today!


In the photos above and below I am applying the resist that I have colored with black dye over the water soluble pencil drawing with a tiny air compressor. I wear a special glove on my hand to help with hand pain.


Painting on silk is done lying flat like watercolor painting and is tough on the neck and back. Looking at myself working in this photo answers my question "Why am I getting so hunchbacked?"

One silk painting hanging on the line and one drying in the stretcher. Next I will steam set the resist lines and then re-stretch them and begin applying the dyes.

Wednesday, August 11, 2010
Bonnie Samuel writes about TAFA (Textile and Fiber Art List)
Bonnie Samuel wrote a great article about TAFA on her amazing blog today. I was thrilled when she asked if she could use the photo of me in my studio in the article.

Bonnie begins the article saying;
" TAFA, The Textile and Fiber Art List is a rousing success by any measure. TAFA is the promotional and networking site for member working artists and textile businesses who represent fiber in all forms. The site was conceived and created by Rachel Biel and launched in early 2010, and now boasts 145 members plus to date."To read the full article as well as a plethora of other very interesting articles about the textile/fiber world visit her blog at: Bonnie Samuel Designs Fiber in Art, Culture and Life
Bonnie notes that the price of membership is going up from $25.00 to $48.00 in September so if you are a fiber artist join now!
Tuesday, August 10, 2010
Farm Painting Resisted, Hands on ice

My hands are really struggling with doing resist work and after I apply resist to a silk painting I find that I have to sit with ice on my hands to get the pain and swelling down. I am really wondering how much longer I am going to be able to do this kind of work.But this one is done, and after it dries I will steam it in the silk steamer for a few hours to set the dye in the resist and to activate the resists holding properties. Then I will put it back on the stretcher and begin applying the layers of dye.

Sunday, August 8, 2010
Brattstock


Saturday we went to Brattstock and it was one of those amazing Vermont summer days with lots of sun and refreshing cool breezes. We sat with the dogs uner ancient trees in dappled shade and listened to some of Brattleboros awesome musical talant. I was exhausted so we didn't stay as long as we would have liked to but it was still a wonderful day.
I am planning to get back to my silk painting Monday after I get back from my Doctors appointments. If all goes well I will get the resist applied Monday and Tuesday and do the first steaming Wednesday.


Subscribe to:
Posts (Atom)